Instructions for registering ID
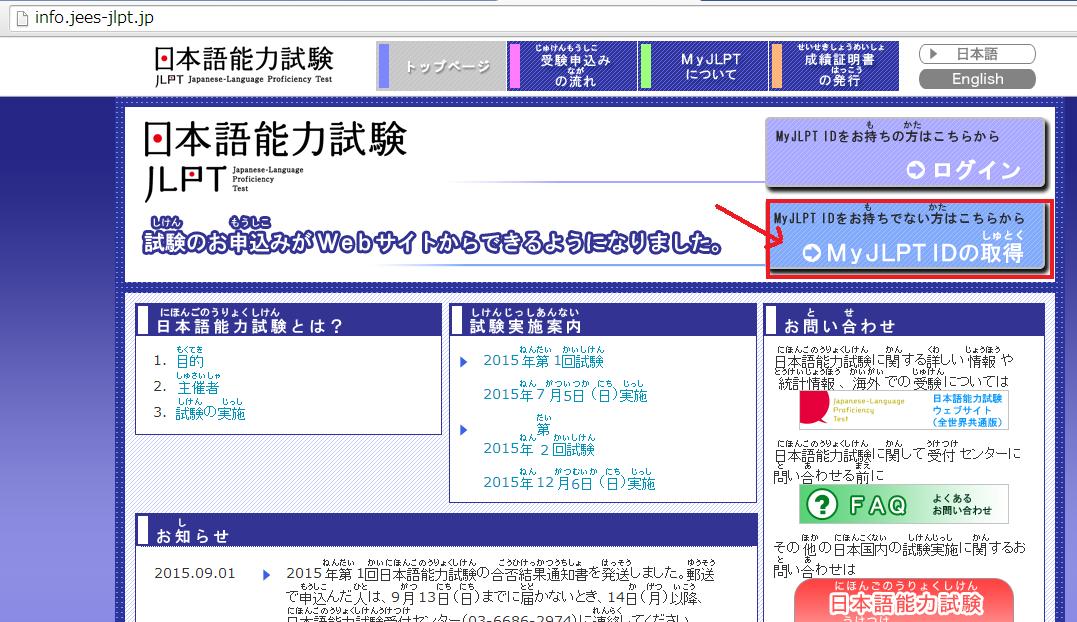
① Go to the site: http://info.jees-jlpt.jp/
② Click on「MyJLPT IDの取得」:
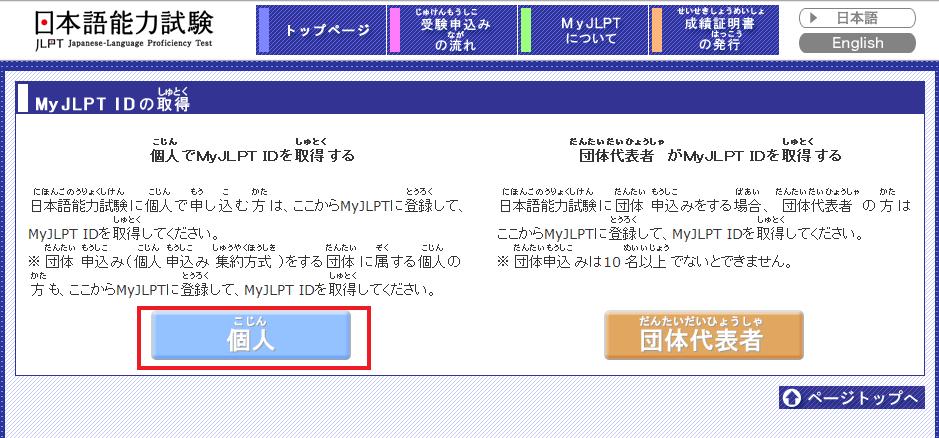
Select 「個人」(Personal):
③ Select language 「日本語 (Japanese)」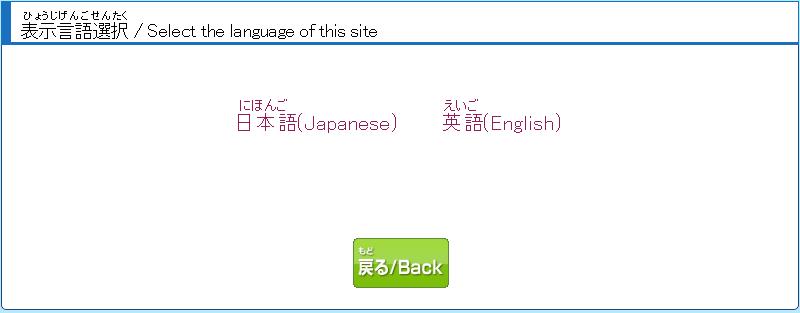
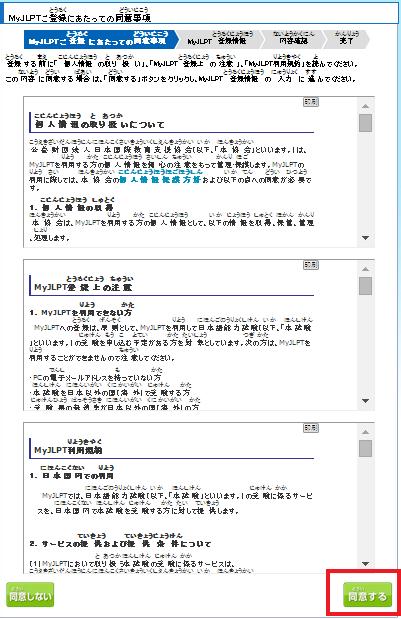
④ Scroll to the bottom, select 「同意する」(Agree). This step is procedural only.
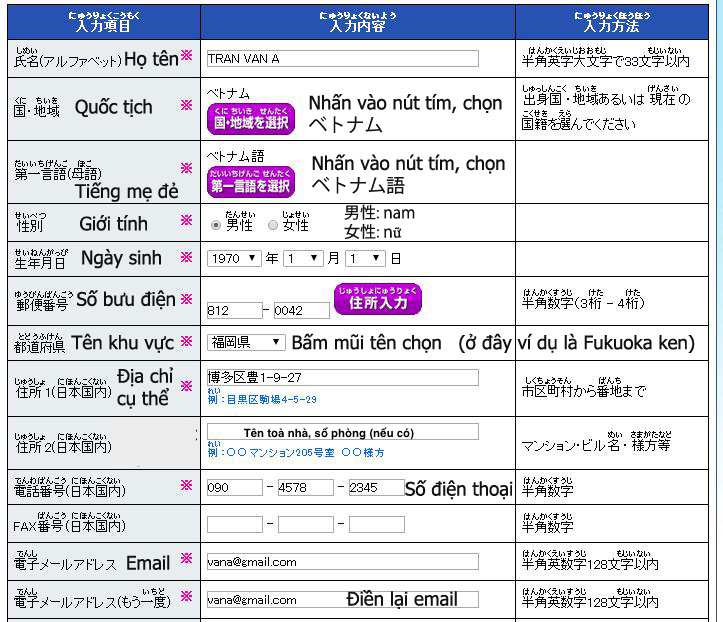
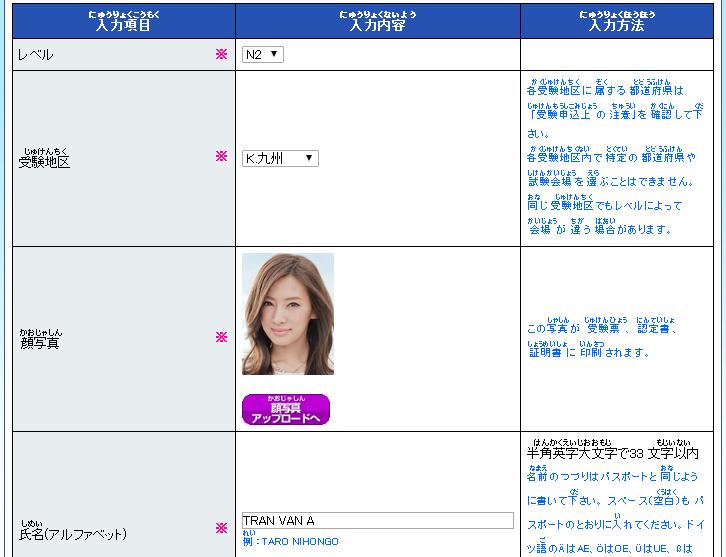
⑤ Fill in personal information: You see the sample in the photo. Note that the name must be written in CAPITAL ONLY Information with a purple asterisk is required. The password you set yourself (from 4 to 10 letters or numbers in English). Note that the address must be filled with the room number for people to send the application form to. After filling in the information, select 「内容確認する」
HOW TO CHOOSE AREA ·
CHOOSE H.近畿 – Kinki if you are currently living in the following provinces:
|
滋賀県
|
しがけん
|
Shiga
|
|
京都府
|
きょうとふ
|
Kyoto
|
|
大阪府
|
おおさかふ
|
Osaka
|
|
兵庫県
|
ひょうごけん
|
Hyougo
|
|
奈良県
|
ならけん
|
Nara
|
|
和歌山県
|
わかやまけん
|
Wakayama
|
CHOOSE I.中国 – Chuugoku if you are currently living in the following provinces:
|
島根県
|
しまねけん
|
Shimane
|
|
岡山県
|
おかやまけん
|
Okayama
|
|
広島県
|
ひろしまけん
|
Hiroshima
|
|
鳥取県
|
とっとりけん
|
Tottori
|
|
山口県
|
やまぐちけん
|
Yamaguchi
|
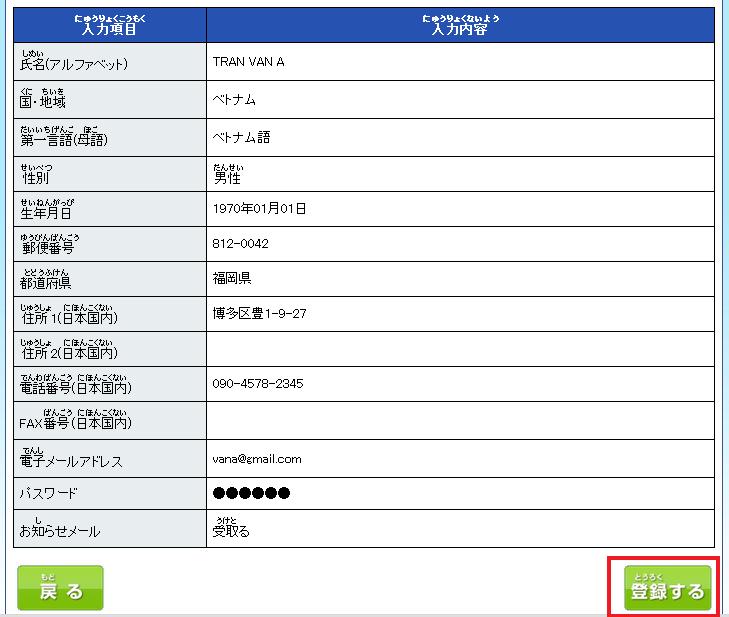
⑥ Check the information again, if OK then press 「登録する」(Register), if you want to edit the information, press the button 「戻る」(Back):
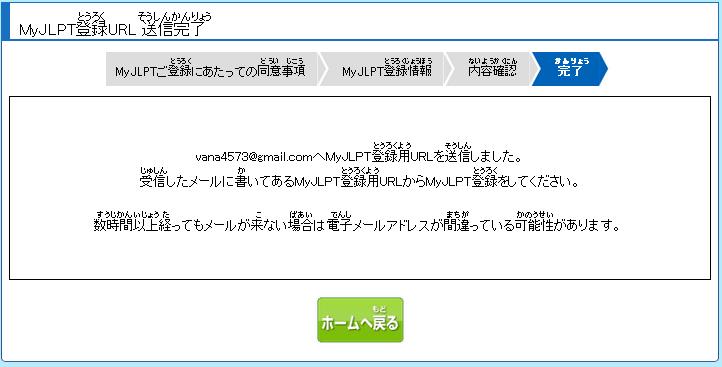
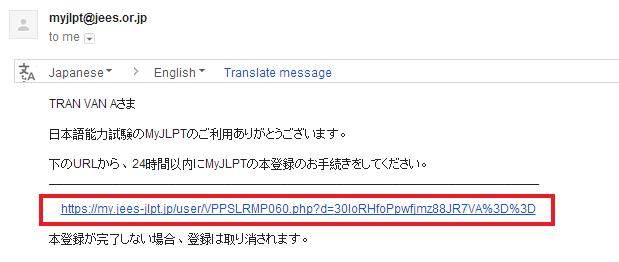
⑦ Notice that the registration confirmation link has been sent to your email.
⑧Open the email, find the new email sent from “myjlpt”, click on the attached link:
Clicking on the link above will display this page, enter your self-set password and press 「送信する」(Submit). This will be the password for you to log in later, so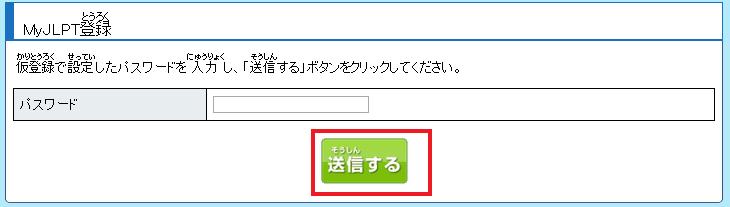
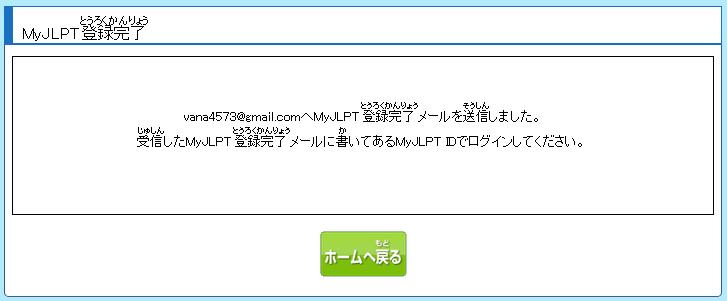
⑨ Complete the registration, return to the homepage to login 「ホーム戻る」
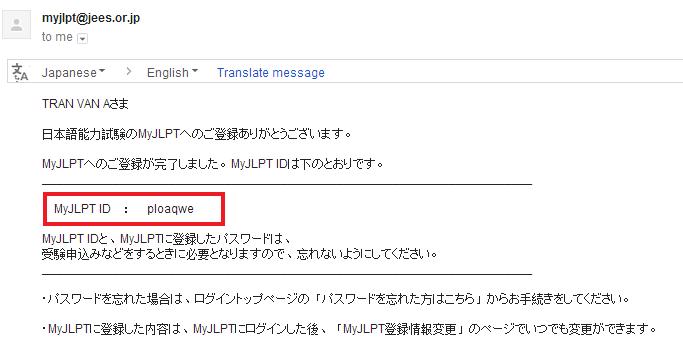
⑩ Open the email to get the newly created ID. Save this ID and the password you just registered above so that you can later view your scores and register for the next exam.
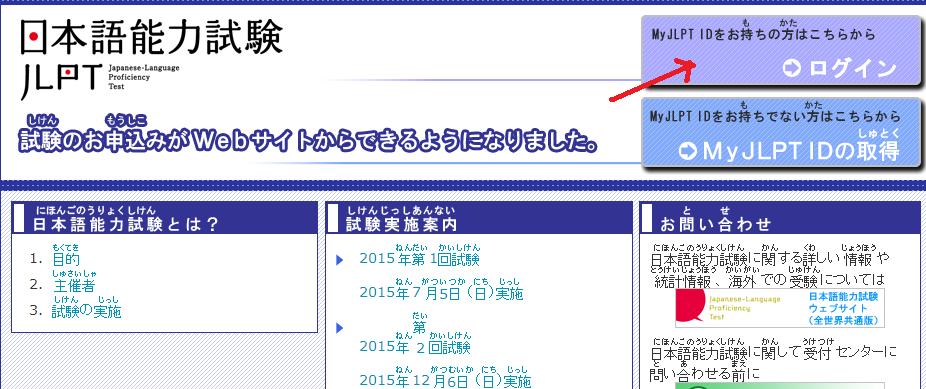
① On the homepage, click on “ログイン” (Login) to sign in.
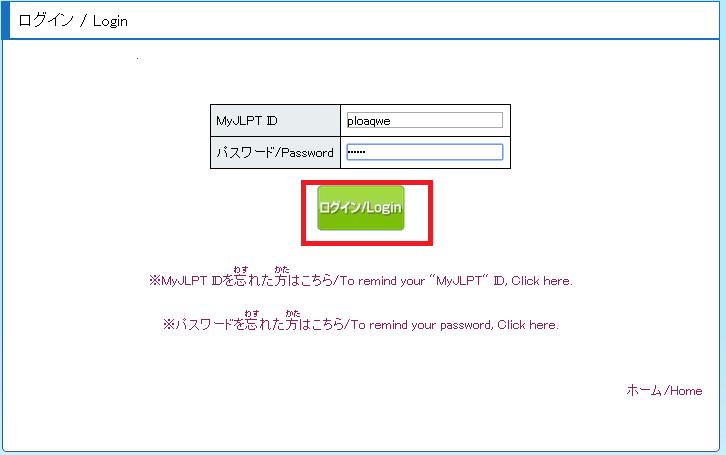
② Enter the ID and password you just registered, then click “Login.”
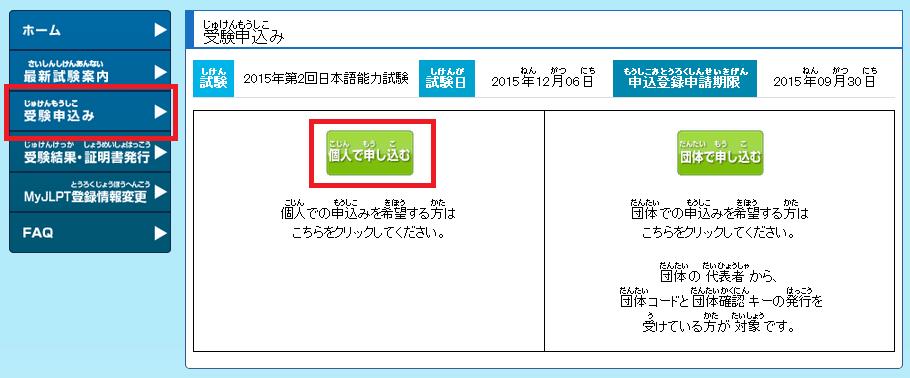
③ On the following screen, choose “受験申し込み” (Exam Registration):

④ Select “個人で申し込む” (Apply as an individual):
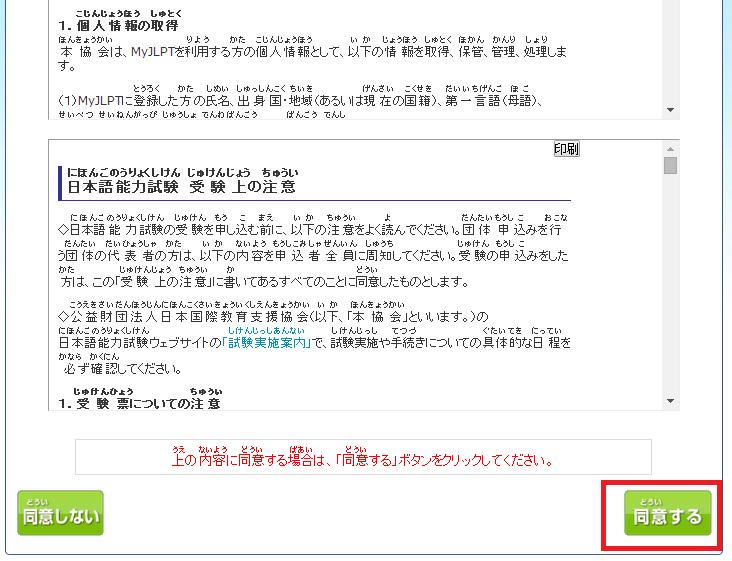
⑤ Scroll down and select “同意する” (Agree). This step is procedural only.
⑥ Điền thông tin dự thi, xem hướng dẫn upload ảnh đại diện ở dưới:

Nếu các bạn không biết mình thuộc khu vực thi nào thì tra ở đây nhé:
A. Hokkaido: Hokkaido
B. Tohoku: Aomori, Iwate, Miyagi, Fukushima
C: Kanto: Ibaraki, Tochigi, Gunma, Saitama, Chiba, Tokyo, Kanagawa
D: Niigata: Niigata
E: Hokuriku: Toyama, Ishikawa, Fukui
F. Koshin: Yamanashi, Nagano
G. Tokai: Gifu, Shizuoka, Aichi, Mie
H. Kinki: Shiga, Kyoto, Osaka, Hyogo, Nara, Wakayama
I. Chugoku: Shimane, Okayama, Hiroshima, Yamaguchi
J. Shikoku: Tokushima, Kagawa, Ehime, Kochi
K. Kyushu: Fukuoka, Saga, Nagasaki, Kumamoto, Oita, Miyazaki, Kagoshima
L. Okinawa: Okinawa
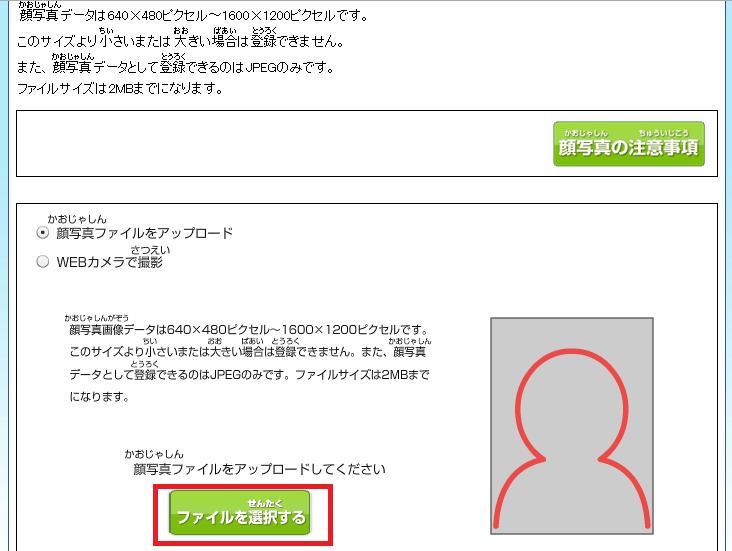
How to upload a profile picture: The image must have a size ranging from 640 x 480 px to 1600 x 1200 px and should not exceed 2MB.
Select a file from your computer by clicking on 「ファイルを選択する」 (Choose a file).
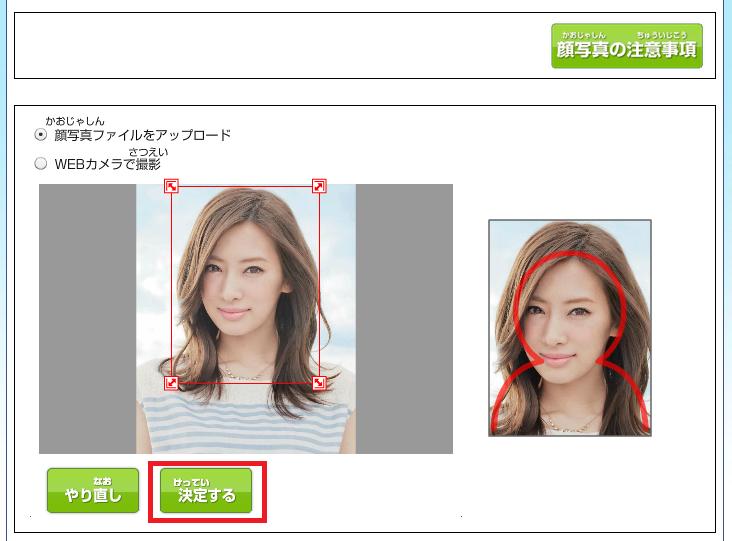
Adjust the image to fit the frame, then click 「決定する」 (Decide).
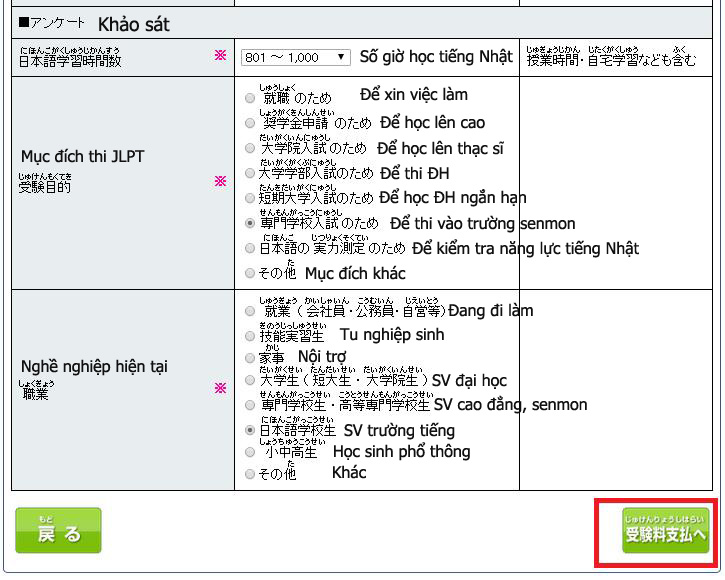
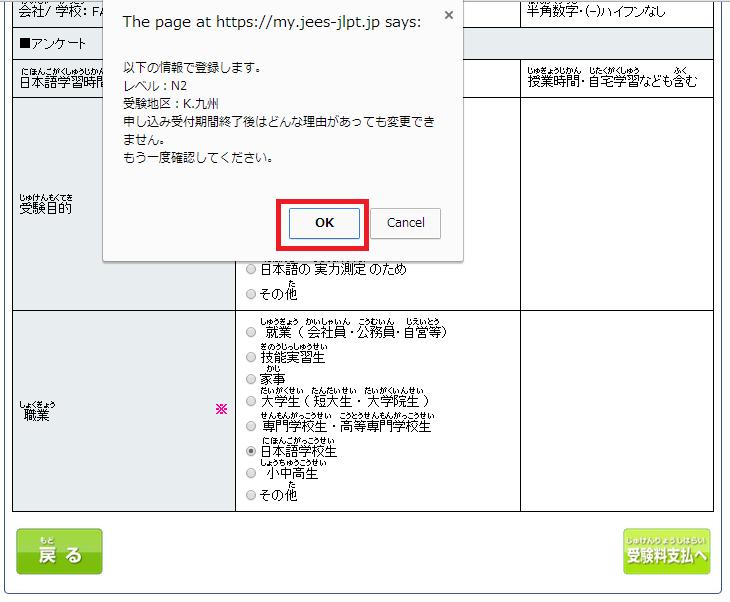
⑦ After filling in all the necessary information and uploading the profile picture, choose 「受験料の支払いへ」 (Proceed to exam fee payment). Review the examination details and confirm the information. If everything is correct, press OK.
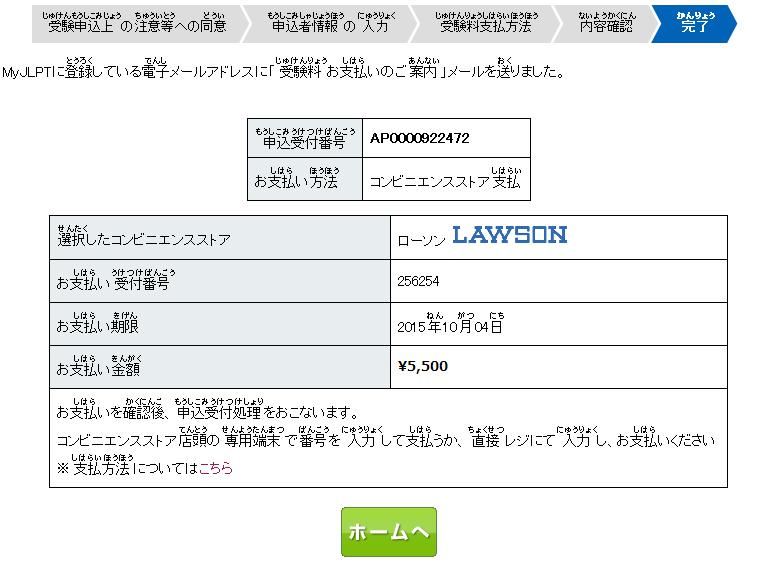
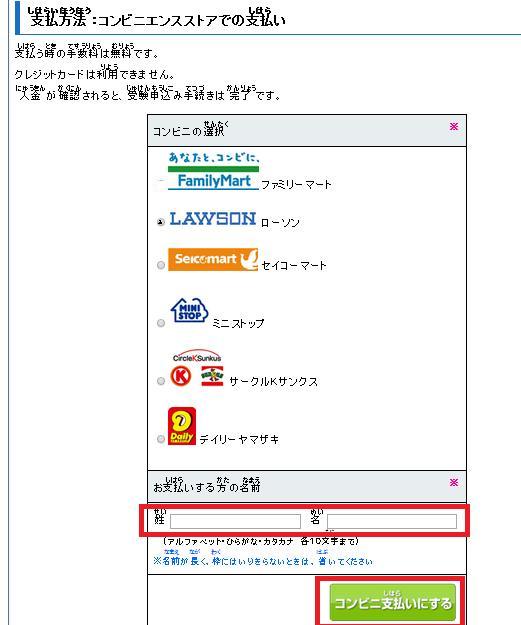
⓼Payment via Konbini
You can make the payment at either Lawson, Ministop, or Family Mart, depending on the nearest location. Select the convenience store name for payment (for example, Lawson), then fill in your last name and first name in the designated fields. Name should be written without spaces. After entering your name, choose 「コンビに支払いにする」 (Select payment at the convenience store).
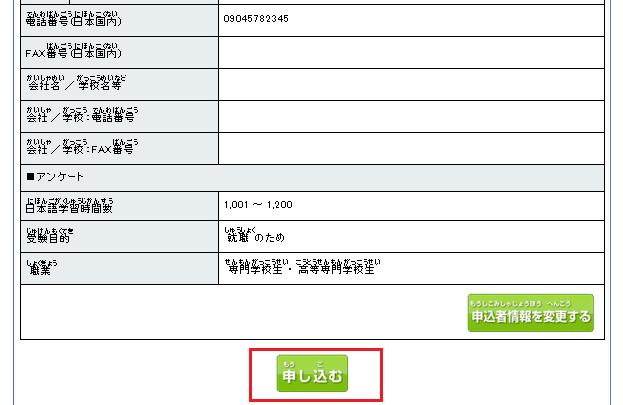
 The information table appears, scroll down, and select 「申し込む」 (Submit application).
The final notification appears as follows. The exam registration process will be completed after you make the payment at the convenience store (konbini). Remember to take a screenshot of the payment code (お支払い受験番号, in this case, 256254) to bring to the convenience store (konbini). Make sure to complete the payment before the deadline specified in this section (お支払い期限).